Index
Course
This is the Winter 2020 version of Discrete Mathematics I — AKA DM1 — AKA CS 237. Compare this with your version, which as of Spring 2020 has been renamed CSE 280.
Syllabus
Schedule
(This is reproduced from the syllabus.)
Reading the book is a regular activity you are tasked with. There are three main sections and essentially three months (12 full weeks) in the semester. That’s one main section per month, or about one subsection every week. You are welcome to read ahead and work exercises/problems/puzzles at your own pace, but don’t get behind!
More details will be available in each week’s course files, but here’s an outline:
| Week | Reading | Exercises/Problems/Puzzles (EPPs) |
|---|---|---|
| 01 | <ABC | CRC DGZ CHJ DOK CJF DZB |
| 02 | ABC | OQP USV UCA ODS UGX OGR UWM OPZ UOX OTX |
| UOT OIM UIN OJL UCG OIO UIJ OQT UTQ OYU | ||
| UOH OZD UZM OOY UFZ OKJ UVH OJM ULQ OTD | ||
| UJU OLH UWY OBW USL OYP UBV OKQ UKF OKL | ||
| UEZ OYW UEF OUB UQY | ||
| 03 | DEF | TDR WDT TEH WFC TEJ WFK TER WGP TEU WJS |
| TGE WKC THP WKM TIW WNW TKG WOV TME WQW | ||
| TMZ WRA TNL WRD TNQ WRP TOJ WRU TOL WZO | ||
| TOU TLI WPI TTV WUZ TUK WVQ TUQ WVU TUW | ||
| TVL WWS TXG TKH WUE | ||
| 04 | GHI | EBQ MGX ECI MHB ECT MKJ EFE MKL EFS MLB |
| EJE MLU EJK MMC EJU MNE EKQ MON | ||
| 05 | JKL | QAM REX QCV RFC QCZ RFF QDM RGL QEB RGM |
| QFK RHB QGK RVB QGT RJV QIQ RLH QKA RNC | ||
| QKT RNM QOS ROP QRQ ROX | ||
| 06 | MNO | FAB ISM FBH ITT FDK IVO FDZ IWC FJH IWK |
| FJY IXT FMD IYJ FOJ IZL FOY VAO FQI VAR | ||
| FQL VAY FQW VCR FRM VEM FUA VFJ FVF VGU | ||
| FVH VGX FXI VIB FYR VIW | ||
| 07 | PQR | GMQ JPZ GMY JQA GRZ JYA GXF XAJ GYI XFO |
| 08 | GYN XGG | |
| 09 | STU | LDA SQI LJP SUF LNR YGT LDO YCF LUM YZU |
| 10 | LTI YDQ LND YTR LGO YIV | |
| 11 | VWX | HST KDB HTC KPS ABR KWD HRR KEO HMO HIJ |
| 12 | KLE HAB KOV HBT AGA KNF HJS HAX KHQ HKE | |
| KBB HRL AGD HSG KHO ANA HLX KSI HTR KSQ | ||
| HBE KSC | ||
| 13 | YZ@ | BAO NCO PDQ NTC PTW NTM PMV NES BRZ BRE |
| NGP BRQ PIQ PRK NIO PFA BGT NGI NLR BSP | ||
| NBO PBI BJO NKY BMI |
Tools
Regarding tools in general, here’s a thought by Howard Rheingold from his book, They Have A Word For It:
If you examine the beliefs of any master craftsman, you will discover a certain reverence for tools as worthy friends. The world-renowned Japanese temple carpenters, for example, spend much more time sharpening a tool than they spend making the cuts. The spirit of fine Japanese carpentry dictates that the planning and contemplation of a construction project should take much longer than the execution; in some cases, the carpenter lives on the site of a house or temple for at least a year, paying attention to the geography and the light, sharpening his tools, visualizing each cut, each piece of joinery, in his head, over and over again.
Any Computer Professional, no matter what specialty area he or she focuses on (science, engineering, technology, math), needs a good set of tools. The two main tool platforms are Windows and Mac. If you prefer Linux (or some other similar platform), you probably do not need any help provisioning your professional toolbox. Otherwise, select your preference and read on. Note that the tools you will need are few, but powerful! Note too that you must have a steady, reliable Internet connection (use the BYUI WiFi, not BYUI Visitor) to be successful.
Windows
64-bit only. If you do not have 64-bit Windows, please get it!
Git
Watch Video on How to Install Git for Windows (older version).
[ ]Install (latest version) Git for Windows:- https://github.com/git-for-windows/git/releases/download/v2.26.2.windows.1/Git-2.26.2-64-bit.exe — or less directly, if you want to have a fuller experience, start at: https://git-for-windows.github.io
[ ]Run the installer and click Next five times to accept the defaults, pausing before the sixth Next to change the default on Adjusting the PATH Environment to be the third choice (Use Git and optional Unix tools from the Command Prompt). Now click Next five more times, again accepting all the defaults, and then click Install. Once it is finished, first uncheck View Release Notes, then click Finish.[ ]Bring up the Windows Command Shell (AKA Command Prompt, the cmd.exe program) by pressing the “Windows” key (the one with the Windows logo on it) and, while holding that key down, typingRto open theRundialog and enteringcmd.[ ]Check that you have installed this tool correctly by entering the following command:
git
[ ]Make sure you see output that looks like usage instructions for the “git” command, and NOT an error message like
'git' is not recognized as an internal or external command ...
[ ]Leave this Command window open, as you will need it for entering the next command (see below).
Emacs
Set HOME Environment Variable
[ ]Enter the following command in the new Command window:
setx HOME "%USERPROFILE%"
[ ]Close this Command window and open a new one.[ ]Now enter the following command, and make sure it prints out the directory you were connected to when you first opened a Command window (which usually is something likeC:\Users\unamewhereunameis your user name).
echo %HOME%
[ ]Keep this Command window open, as you will need it for the Spacemacs installation steps (below).
Download and Install
Get the installer for the latest version (26.3) here:
https://github.com/arbv/emacs-msi-installer/releases/download/v26.3-per-user/emacs-26.3-x86_64.msi Run this wizard and accept all the defaults for the easiest installation.
For ease of use, the built-in shortcut functionality of Windows enables the automatic startup of a Daemon on boot, and the creation of a Client that will either connect to that Daemon, or start a new instance if no Daemon is running. Daemon essentially means Server in this context.
IMPORTANT: The following assumes you chose the
C:\Program Files\GNU Emacs
default location when installing Emacs. If you chose some other location, change the paths below accordingly.
Create Daemon
[ ]Step 1: Create a shortcut namedEmacs Daemonwith the following target:
"C:\Program Files\GNU Emacs\bin\runemacs.exe" --daemon
[ ]Step 2: Copy the shortcut to theStart Menu
C:\Users\[USERNAME]\AppData\Roaming\Microsoft\Windows\Start Menu\Programs\
[ ]Step 3 [Optional]: To start at boot, create a copy of the shortcut in theStartupfolder:
C:\Users\[USERNAME]\AppData\Roaming\Microsoft\Windows\Start Menu\Programs\Startup
Create Client
[ ]Step 1: Create a shortcut just namedEmacswith the following target:
"C:\Program Files\GNU Emacs\bin\emacsclientw.exe" -n -a "" -c
This shortcut first tries to connect using emacsclient and if that fails, it falls back to runemacs.
[ ]Step 2: Copy the shortcut to theStart Menu:
C:\Users\[USERNAME]\AppData\Roaming\Microsoft\Windows\Start Menu\Programs\
This is your primary shortcut for interacting with Emacs. Pin this one (not the other) to the Start Menu, and the Taskbar.
Configure File Explorer
Now tell Windows to open all .txt files (for example) with Emacs by
default, and do so by connecting to the Emacs Daemon (or starting a new
instance if no Daemon is running).
[ ]Step 1: Right-click on a file of the type you want Emacs to open.[ ]Step 2: Either choose “Open with..” or hover over it and pick “Choose another app”.[ ]Step 3: Ignore all the options for “How do you want to open this file?” and choose “More apps”.[ ]Step 4: This is the crucial step! “Look for another app on this PC” but do NOT find the.exefor Emacs — instead find theEmacsshortcut in your Start Menu, and use that.[ ]Step 5: Check the box “Always use this app to open .txt (or whatever) files”.[ ]Hereafter: when you open the file by clicking on it Windows will do so using this shortcut, which makes it work as expected.
Spacemacs
Watch Video on How to Install and Configure and Initialize Spacemacs
[ ]Enter the following command in the Command window, which you should have left opened (if not, see above for how to bring it back):
git clone https://github.com/syl20bnr/spacemacs .emacs.d
Save typing by copying it to your clipboard from the box above, and then pasting it:
Beware that if you copy this from the Spacemacs home page (after pressing the “Install” button) there is a subtle difference that can trip you up. Before hitting Enter be sure to back up and remove the ~/ in front of the .emacs.d so that the command looks like the one above.
[ ]Enter the correct command, and then be patient, as it will take a few seconds to clone this large repository to your computer.[ ]You will get an error if the .emacs.d directory already existed and had something in it, the reason being that git will only clone into an existing directory if it is empty. Move or rename it, or if there is nothing important in that directory, the following command will remove it:
rmdir /s /q .emacs.d
[ ]Run the git clone command again if necessary.[ ]Now to configure Spacemacs, enter this command in the same Command window:
git clone https://github.com/rickneff/firstthreeodds .spacemacs.d
[ ]Start up Emacs (use your shortcut) and the Spacemacs installation process will begin.[ ]Again, be patient, it’s downloading and installing dozens of plugins (called packages in Emacs-land).[ ]While you’re waiting, visit the Spacemacs home page and browse around: http://www.spacemacs.org[ ]If it looks like something went wrong, restart Emacs. Sometimes, network glitches cause some packages to be incompletely downloaded, but this is easily recoverable by restarting.[ ]Watch VIM Quickstart Video.[ ]Watch Spacemacs Quickstart Video.
Mac
Homebrew
As stated at the Homebrew website, this is the “missing” package manager for
macOS. With it, you can easily install git (and other Xcode command-line
tools), emacs, all their dependencies, and more.
[ ]TypeCommand Spaceto bring up the Spotlight Search box and enterterminalto open a Terminal window.[ ]Enter this command in the Terminal window to install Homebrew:
/usr/bin/ruby -e "$(curl -fsSL https://raw.githubusercontent.com/Homebrew/install/master/install)"
Emacs
[ ]Enter these two “brew” commands in your Terminal window:
brew tap d12frosted/Emacs-plus
brew install emacs-plus
[ ]You have installed Emacs — but DO NOT RUN IT YET![ ]Verify that your terminal output looks something like this saved output from when I installed emacs on my Macbook.
Spacemacs
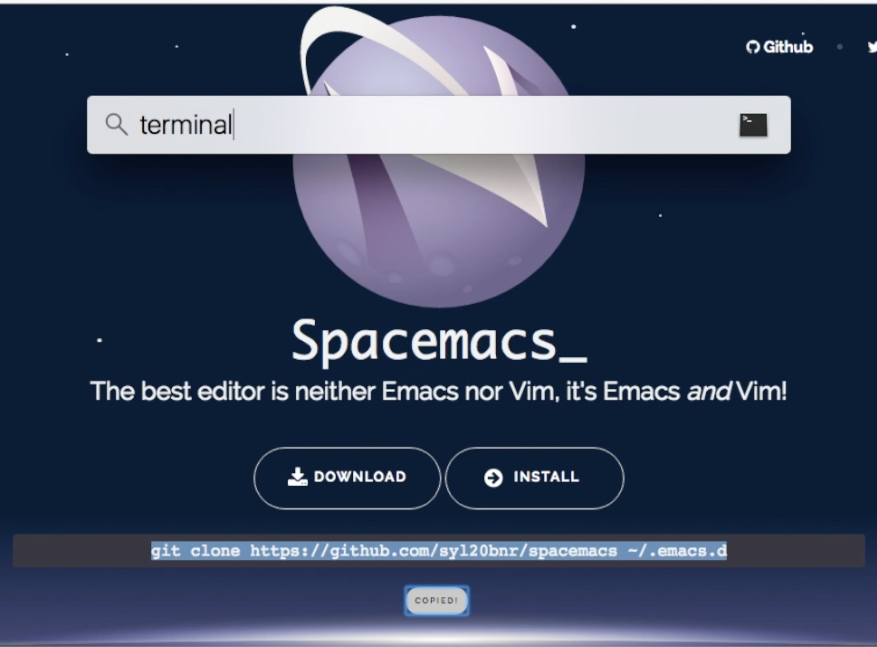
[ ]Open or select a Terminal window.[ ]Enter the following command in the Terminal window. Save typing by copying it to your clipboard from the box below or from the Spacemacs home page, as shown in the following screenshot.
git clone https://github.com/syl20bnr/spacemacs ~/.emacs.d
[ ]Be patient, it will take a few seconds to clone this large repository to your computer.[ ]Now to configure Spacemacs, enter this command in the same Terminal window:
git clone https://github.com/rickneff/firstthreeodds ~/.spacemacs.d
[ ]Enter in your Terminal window:
emacs&
This will start up Emacs, and then the Spacemacs installation process will automatically begin.
[ ]Again, be patient, it’s downloading and installing dozens of plugins (called packages in Emacs-land).[ ]While you’re waiting, visit the Spacemacs home page and browse around: http://www.spacemacs.org[ ]If it looks like something went wrong, restart Emacs. Sometimes, network glitches cause some packages to be incompletely downloaded, but this is easily recoverable by restarting.[ ]Watch VIM Quickstart Video.[ ]Watch Spacemacs Quickstart Video. (This is on Windows, but Spacemacs works on Mac the same.)
Helps
TODO Read the FAQs
Frequently Asked Questions (and their Answers):
- Q1
- Why can’t I view the CSE 280 course on I-Learn?
- A1
- This course is not published on I-Learn until the first day of class.
- Q2
- The workload for this 2-credit class seems excessive. What should I do?
- A2
- Ponder the reasons you are taking this class. Are you striving to learn discrete math? Just here for the grade? Do you see yourself as a good reader, with good reading comprehension skills? A pitfall some of you will encounter is attempting the Exercises/Problems/Puzzles (EPPs for short) without good comprehension of the concepts you are asked to explore by way of these EPPs. Many exercises should take a few seconds, or a few minutes, maybe up to an hour or more for some of the problems (OQP for example) — if you are grasping what you are reading! If you read a sentence or a paragraph or a section, and then think to yourself, I have no idea what what I just read means — that’s a different kind of problem. Reading and understanding take time — is the time you spend doing this productive?
- Q3
- Okay, so I’m not the most skilled reader. It takes me a long time to read and digest things, especially when there are so many links to other things to read (and from them to still others). What do I do, settle for a poor grade? Drop the class?
- A3
- You are responsible for your learning. I as your teacher take seriously my role as and responsibility for being a helper, a facilitator of your learning — but I can’t make it happen. You can compensate for not (yet) being a skilled reader and problem solver, however.
- Q4
- How?
- A4
- Be inquisitive. Be very inquisitive! Ask questions, not just of me, but of your classmates. Share light and knowledge you gain on your own (or through talking with me or my TAs) freely, and appropriately with your peers!
- Q5
- Are we required to study in groups? I’m not a big fan of group work/think.
- A5
- What does the BYU-I Learning Model say about “Teach One Another”? Are you a non-fan because of past experience, where you were let down by members of your group? Were you assigned this group, or was it self-selected?
- Q6
- Yes, and it was assigned. Are you suggesting I should choose my own group to study with?
- A6
- Yes, most assuredly and emphatically YES!
- Q7
- What do you mean by appropriately sharing with my peers?
- A7
- Good sharing and collaboration is a “me lift thee and thee lift me, and we both ascend together” phenomenon. Bad sharing/collaboration is copying someone else’s work and submitting it as your own, to get “credit” for doing some assigned task, while not getting the understanding doing the task was meant to give you.
- Q8
- Are there any tutors for this class?
- A8
Yes, but not through the Tutoring Center. They double as my TAs, and these links are to videos you can watch to be introduced to:
TODO Glean What You Can From Guides and Cheat Sheets For Beginners
TODO Convince Yourself that Learning a Little Lisp is Worthwhile
Read this blog post by Mark Miller, and then be sure to read the article he links to in his first sentence (link preserved here):
This is the best introductory, conceptual article on Lisp I’ve ever seen. It’s written by Slava Akhmechet.